
For detailed information, other images and documents, please select individual articles from the following table.

Chemical injection mortar Classic WIT-C 100
Individual attachment in non-cracked concrete and masonry.

Register now and access more than 125,000 products
Variants
Register now and access more than 125,000 products
- Styrene-free chemical injection mortar
- 2-component reactive resin mortar, styrene-free vinylester
- Cartridges can be used up to expiration of the best before date by replacing the mixer nozzle or by being closed again with sealing cap
Useful information:
Drill perforated and hollow blocks with a rotary drill (without impact mechanism) – higher load-bearing capacities
Drill hole cleaning
- Masonry + aerated concrete: 2x blow-out, 2x brush-out, 2x blow-out
- Non-cracked concrete: 2x blow-out, 2x mechanical brush-out, 2x blow-out
- If the drill hole is M20 or larger, blow out with compressed air using the appropriate compressed air nozzles
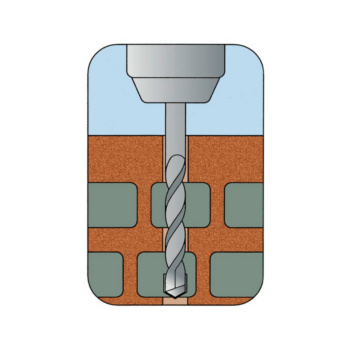
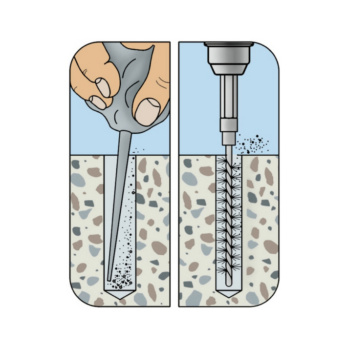
Create the drill hole
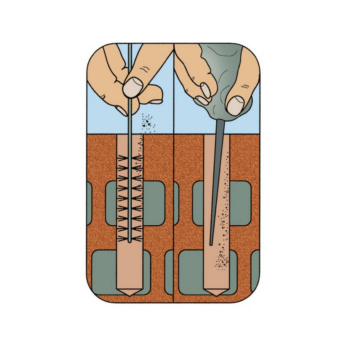
Clean the drill hole (blow out 2x/brush out 2x/blow out 2x)
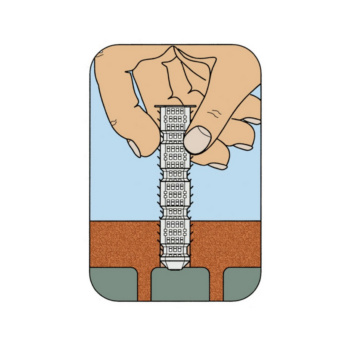
Insert perforated sleeve
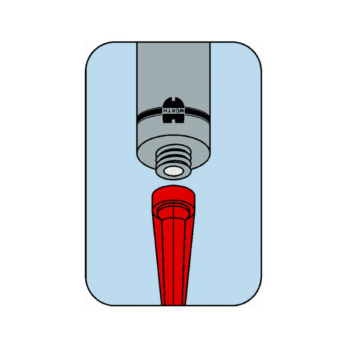
Screw mixer onto cartridge
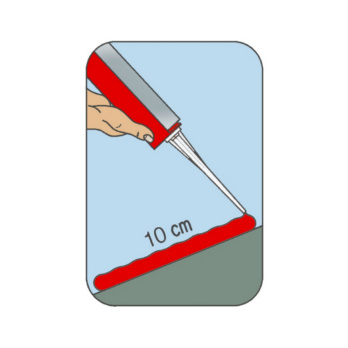
Discard the first section of mortar (until the mortar is uniformly coloured - approx. 10 cm)
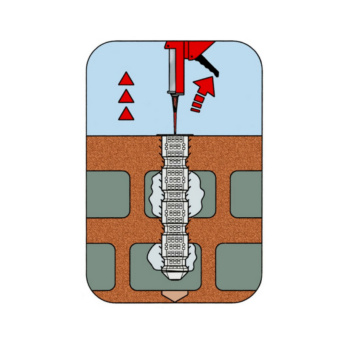
Completely fill with composite mortar from the end of the perforated sleeve (see enclosed leaflet)
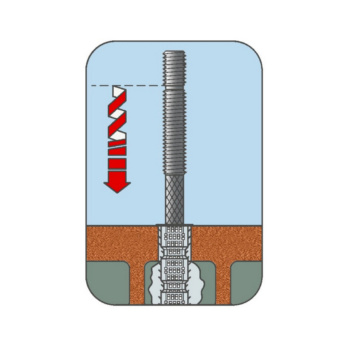
Press in the anchoring element up to the bottom of the sleeve while turning slightly
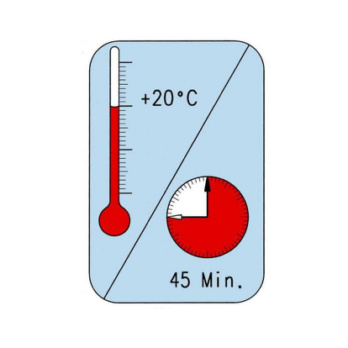
Observe the injection mortar curing time
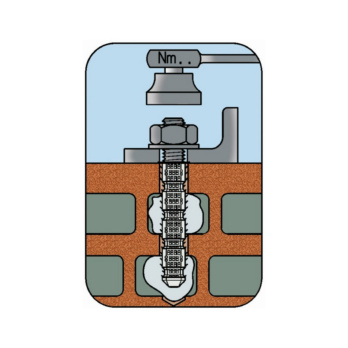
Mount the component; do not exceed the maximum torque
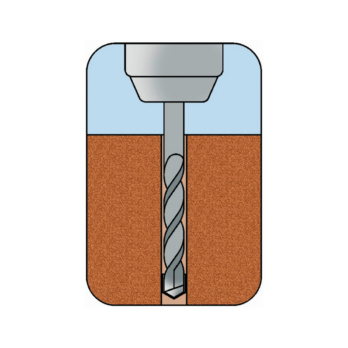
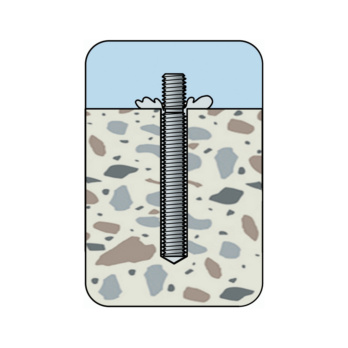
Create the drill hole
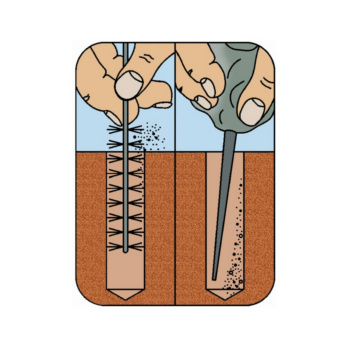
Clean drilled hole (blow out 2x/brush out 2x/blow out 2x)
Screw mixer onto cartridge
Discard the first section of mortar (until the mortar is uniformly coloured - approx. 10 cm)
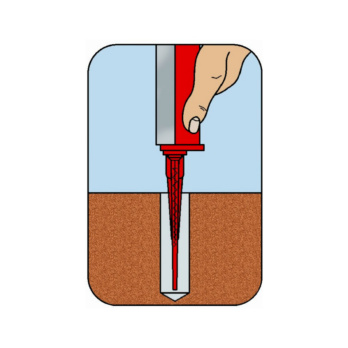
Fill with composite mortar starting from the bottom of the drill hole (see enclosed leaflet)
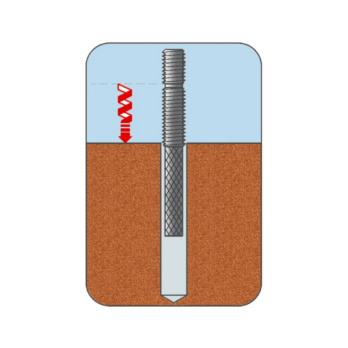
Press in the anchoring element up to the bottom of the drill hole while turning slightly
Visual check of mortar volume, embedment depth mark
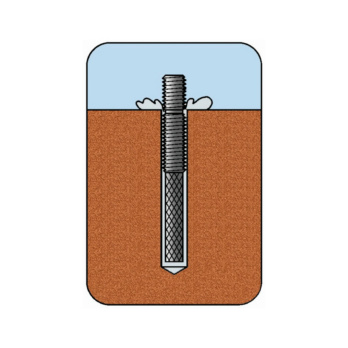
Observe the injection mortar curing time
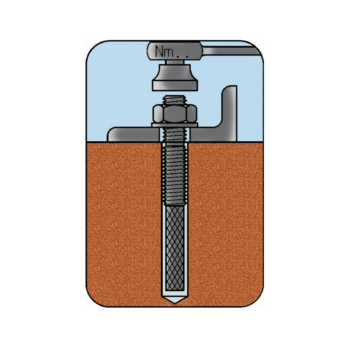
Mount the component; do not exceed the maximum torque
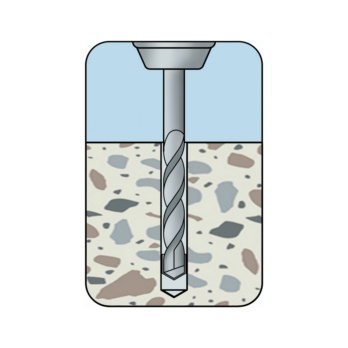
Create the drill hole
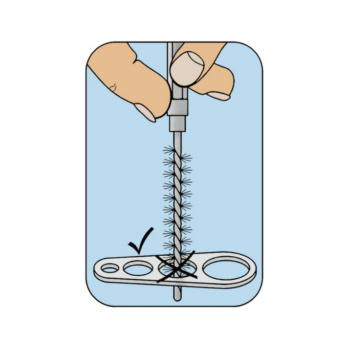
Check the cleaning brush diameter
Clean drill hole (blow out twice, brush out mechanically twice, blow out twice), blow out with compressed air in case of M20 drill hole or larger.
Screw mixer onto cartridge
Discard the first section of mortar (until the mortar is uniformly coloured - approx. 10 cm)
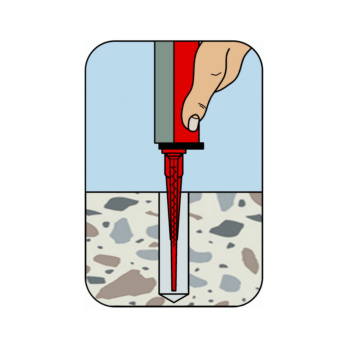
Fill composite mortar from bottom of drill hole
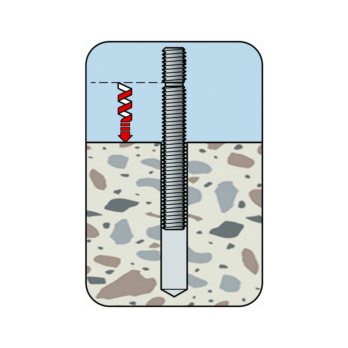
Press in anchoring element up to drill hole base while turning slightly
Visual check of mortar volume, embedment depth mark
Observe the injection mortar curing time
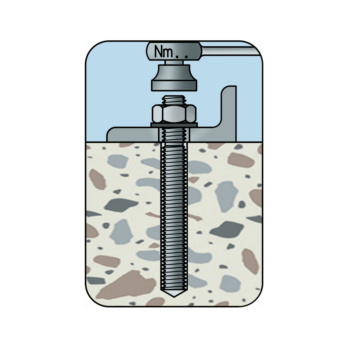
Mount the component. Do not exceed the maximum torque
- The injection anchor can be anchored in the following anchoring bases: Solid brick, solid sand-lime brick, vertically perforated brick, perforated sand-lime brick, hollow lightweight concrete blocks, hollow concrete blocks, aerated concrete and non-cracked concrete
- Perform anchorages in solid brick (clay brick and sand-lime brick) and non-cracked concrete without a perforated sleeve
- Use a perforated sleeve for anchorages in perforated brick (vertically perforated brick, perforated sand-lime brick, hollow lightweight concrete blocks and hollow concrete blocks) and aerated concrete
- Anchor rod or female thread sleeve in galvanised steel can be used in enclosed areas, e.g. homes, offices
- Anchor rod or female thread sleeve in A4 stainless steel can be used outdoors or in wet rooms
- Suitable for attachments not subject to approval, e.g. fence posts, wall cupboards, grilles, sanitary ware, lights etc.
Select RAL-colour code
!! NOTE: On-screen visualisation of the colour differs from real colour shade!!